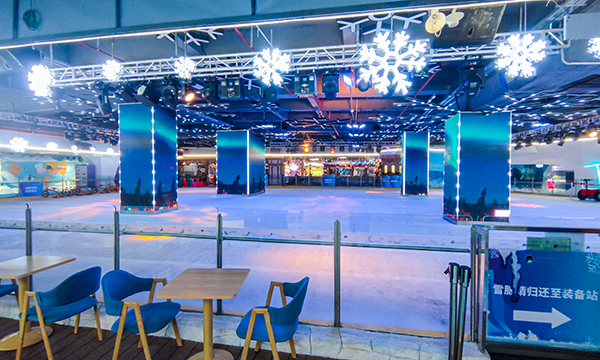

Here's the thing about ice rink design: most people think it's about finding a nice reference picture and copying it. Do that and the problems come later — every one of them. I've watched someone take a northern-China drawing and drop it unchanged into a southern city, and by summer the ice was fogging, the ceiling was dripping with condensation, and the power bill had doubled. Ice rink design isn't copying a picture. It's getting three numbers right: cooling load, pipe spacing, and barrier height.
Let's start with cooling load, because it's the number everything else hangs on. Get it wrong and your plant either can't hold the ice or burns money all day.
A recreational rink runs at 150–180 W/m²; a competition rink needs 180 W/m² or more. But you don't select the chiller on the running load — you select it on the initial freeze load. First freeze is roughly 1.5 to 2 times the running load. In a dry northern city you can think in terms of around 300 W/m² for the initial freeze; in a hot, humid southern city you go straight to 400–500 W/m². Why is the south so much higher? Humidity. Water vapour in the air condenses on the ice, and that latent heat is all carried by the refrigeration system, on top of higher infiltration — so the load climbs.
| Region / condition | Design load |
|---|---|
| Dry north (running) | 150–180 W/m² |
| North (initial freeze) | ~300 W/m² |
| Hot humid south (initial freeze) | 400–500 W/m² |
| Guangzhou | 386 W/m² |
The real case that proves the point: a 700 m² rink in Guangzhou's runs a 270 kW plant, or 386 W/m², and day-to-day it only needs about half its compressors. If you'd sized that plant on the running load, you'd never have frozen the slab in the first place. There's a quick capacity rule too: ice area times 0.4 to 0.5 kW. And a ski slope is a different animal entirely — its snow area starts around 120 W/m², because you're cooling air, not a solid ice sheet. The gap between a competition venue and a recreational one matters at the load stage too — pin down the intended use first, then the load follows.
Once the load is fixed, you move to pipe spacing. Under the ice sits a grid of Ø25 HDPE pipe, with a glycol–water solution circulating through it to pull heat out of the slab. The grid is normally laid at about 13.5 metres of pipe per square metre, which works out to roughly 75 mm spacing. Space it too wide and the ice temperature becomes uneven — soft in places, hard in others, and skaters feel every bump. Space it too tight and you're paying for extra pipe and fighting more pressure drop for no gain, which means a bigger pump. 75 mm is the practical sweet spot that holds the ice at a steady -4°C to -5°C. The pipe is usually laid in a serpentine loop with separate supply and return headers — keep them out of the way of the branch runs.
Barrier height is the third number people routinely underestimate. A barrier isn't just a board you stand up. The inner panel is 950 mm high, 10 mm thick PE, sitting on a 280 mm yellow kick plate — about 1.2 m in total. That height catches a skater's centre of mass mid-fall: too low and they go straight over the top, too high and you block the sightlines for spectators. We use PE panel not because it's cheap but because it stays tough and flexible at low temperature, so it cushions the impact when someone hits it. The national standard sets hard requirements on the thickness, height and impact strength of the barrier, so this is not where you save money.
A few supporting numbers worth memorising at the same time. Ice thickness starts at 25 mm for recreational, 30 mm for competition, and 50 mm for figure skating. The coolant is commonly 40% glycol, which freezes around -24°C — plenty of margin under a -13°C/-10°C supply and return; go any thicker and the viscosity climbs and the pump eats more power. Insulation is 100 mm XPS — botch that layer and the cold leaks straight out of your budget. Refrigerant is increasingly R507-class, with an ODP of zero. The ice surface itself has a flatness spec of 2 mm over 3 metres, held in place by a daily pass of the ice resurfacer. And in a southern project, reserve a spot for the dehumidifier — if you can't hold the humidity down, the ice fogs every single day.
Then there are the two things that get decided at the design stage and are easy to skip: layout planning and equipment selection.
On planning, the ratio of ice surface to support areas has to be worked out early — skate-change zone, rest area, equipment room, dehumidifier position, and the electrical room all need their space reserved. Too many owners stare at the ice surface and forget the plant room, then the chiller arrives with nowhere to put it, and the rework costs more than the design fee ever did. Pedestrian flow, fire evacuation and water supply are all planning-stage decisions, not construction-stage surprises. Standard dimensions matter too: a competition rink is 60 m by 30 m, and a recreational rink starts at 800 m². The plant room also needs a ventilation opening — air-cooled chillers dump heat into the air, and boxed in without airflow their output drops. Ice temperature also varies by discipline: recreational holds around -4°C to -5°C, competition can go down to -8°C, and figure skating lower still — so fix it at the planning stage by intended use.
On equipment, the chiller, the pipe grid, the ice resurfacer and the barrier are the core pieces, and their models and specs should be locked during design, not changed halfway through construction. The chiller especially needs multiple units in parallel with at least one spare — a single unit failing means the whole venue stops, and that lost revenue is never made up by the money you saved on one machine.
And one mistake comes up more than any other: borrowing a ski slope's air-cooler approach for a rink. A rink has to use pipe contact cooling — air coolers are for ski slopes, and on a rink they give uneven ice and burn power for nothing. Proper rink design runs in three steps: concept design to fix the load and the chiller, construction drawings for the pipe layout and runs, and detailing down to every valve model. None of the three can be skipped.
One last reminder: every parameter in ice rink design has to match the climate of the city you're building in. The northern-China playbook doesn't work in the south, and the reverse is just as true. And every yuan you save at the design stage tends to come back as power bills and rework once the venue is running. Get the load right first, and everything else finally has something to stand on.
Beijing Yangsheng Ice & Snow Technology Co., Ltd. — ice venue design, refrigeration system construction, and turnkey delivery.