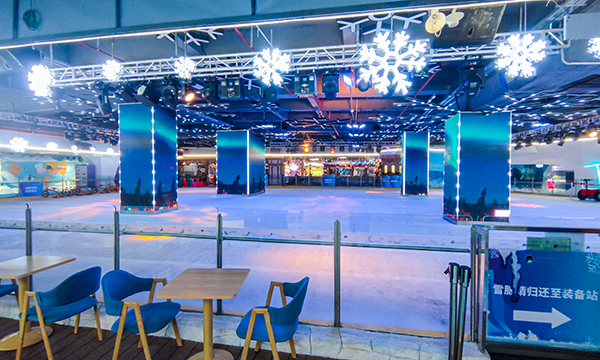

A mall atrium can look like the perfect rink location until the slab, power supply and clear height are checked. Ice and equipment place several hundred kilograms on each square metre, while a 600 m² rink can require a 250–300 kW chiller plant. If those facts surface after a lease is signed, the design is already responding to constraints instead of controlling them.
Building an ice rink means fitting a permanently frozen slab into an ordinary building. The reliable route from site selection to opening has eight stages. Grouped below into practical decisions, they show what to confirm, what to design and what to test before skaters arrive.
Stage 1 is site assessment. Begin with clear height, floor load capacity and evacuation width. The chiller, ceiling work and pipe grid all consume headroom, so a low ceiling can prevent the equipment from fitting. A structural review should establish whether the slab needs reinforcement. Water and drainage deserve equal attention because ice pouring, melting and washing all need manageable water routes.
For developers comparing indoor ice and snow solutions, the utility conversation should happen before the lease is finalised. Ask for a capacity-upgrade plan if the building cannot support the refrigeration plant. Do not wait for the equipment to arrive.
Stage 2 covers permits and approval. In China, refrigerant pressure vessels fall under special-equipment regulation, so submit the design for review early. Fire review addresses evacuation routes and fire compartments, while sanitation approval is a separate gate before opening. Start the paperwork before ground is broken; it cannot be bolted on after installation.
Use this first-pass checklist before committing to a site:
Can the floor slab carry the ice and equipment, or is reinforcement required?
Is there enough clear height for the chiller, ceiling work and pipe grid?
Does the power supply have sufficient headroom, with an upgrade route if needed?
Are evacuation width, water supply and meltwater drainage workable?
Stage 3 is design, and cooling load is its controlling number. A recreational rink runs at 150–180 W/m², while a competition rink needs 180 W/m² or more. Those are running loads, not the basis for selecting the plant. Initial freeze is roughly 1.5–2 times the running load; in a hot, humid southern city, select 400–500 W/m². A quick planning rule is ice area multiplied by 0.4–0.5 kW.
The 700 m² rink at Grandview Mall in Guangzhou shows why. Its plant is 270 kW, equivalent to 386 W/m², yet day-to-day operation uses only about half of its compressors. That capacity serves the first freeze rather than representing an oversized everyday system. When discussing an ice rink refrigeration system, ask which operating condition governs the selection.
Dehumidification and heat recovery belong in the same design exercise. Condenser heat can be reclaimed to warm ice-making water instead of being discarded. Keep rink and ski-slope engineering separate too: a rink uses underground pipe contact cooling, whereas a ski slope cools air with roof-mounted coolers. Their equipment selection and pipe layouts are not interchangeable.
| Design checkpoint | Source value | Practical use |
|---|---|---|
| Recreational running load | 150–180 W/m² | Normal operation |
| Competition running load | 180 W/m² or more | Normal operation |
| Initial freeze | 1.5–2 times running load | Plant sizing basis |
| Hot, humid southern city | 400–500 W/m² | Plant selection |
| Early capacity estimate | Ice area × 0.4–0.5 kW | Planning rule |

Stage 4 turns the design into a cold, stable floor. Below the ice are levelling sand, insulation and a structural base, with the pipe grid above. Insulation is typically 100 mm of XPS; a poor layer lets cold leak toward the floor below and increases summer energy use. The structural base is usually 60 mm of frost-resistant concrete with reinforcement to resist cracking from frost heave. In humid southern climates, dehumidification must be coordinated here as well, or the ceiling can drip and the ice can fog.
Stage 5 installs the chiller, pipe grid and glycol loop. The grid uses Ø25 HDPE pipe cast into the concrete. A common coolant is a 40% glycol–water solution, with supply and return temperatures around −13°C/−10°C. Refrigerant is increasingly R507-class, with zero ODP to meet environmental rules.
Redundancy matters because one chiller failure can stop the whole rink. Commercial rinks therefore run multiple units in parallel and keep at least one spare. The Guangzhou project provides an example of several twin-screw compressors operating side by side.
Stage 6 is ice pouring. Build the slab in 30–50 passes rather than flooding it once. The finished ice must be at least 25 mm thick, or 30 mm for competition use, and first freeze takes roughly 72 hours. Hold the ice at −4°C to −5°C; a surface that is too hard or too soft changes what skaters feel. A promise to flash-freeze a full rink overnight is a warning that corners may be cut.
Stage 7 installs the barriers and dasher boards. The inner board is 950 mm high with a 280 mm kick plate, giving about 1.2 m in total. National requirements cover barrier thickness, height and impact strength. Treat rink barrier systems as safety equipment, not a place to trim the budget: a failed board puts a skater at risk.
Stage 8 is commissioning and acceptance. Run the refrigeration system at full load for 72 hours without a fault, then operate the whole venue through a 30-day trial. Fire, sanitation and special-equipment inspections must all pass before opening. Include this period in the programme from day one because it is a common point for schedules to slip.
A rough budget anchor for a standard 860 m² rink is around ¥1,700 per square metre, including equipment, civil works and barriers. Chiller equipment accounts for roughly half, ice surface works about a third, barriers a little over a tenth, and the remainder is pipe installation. Regional conditions and chiller configuration will move the actual figure, so use this as a planning baseline rather than a fixed quotation.
Two operating issues should be addressed before opening rather than chased afterward. In a southern city, hold indoor humidity at 40–55% to limit ice fog and ceiling drips, and reserve the dehumidifier position during design. Once open, use an ice resurfacer every day to keep the surface flat. Put refrigeration filter checks and refrigerant-leak checks on a schedule as part of normal maintenance.

Because the initial freeze imposes roughly 1.5–2 times the running load. A plant selected only for normal operation may maintain ice yet lack the capacity needed to create it. The 700 m² Grandview Mall example, with a 270 kW plant and about half its compressors used day to day, illustrates the distinction.
First freeze takes roughly 72 hours. The refrigeration system must then run at full load for 72 hours without fault, followed by a 30-day trial of the whole venue. Opening also depends on passing the required fire, sanitation and special-equipment inspections.
Check floor load capacity, clear height and evacuation width, then confirm electrical capacity, water supply and drainage. For a 600 m² rink, allow for a chiller plant of 250–300 kW and obtain a utility upgrade plan if necessary. Resolve these questions before signing, not after equipment has been ordered.
Each of the eight stages protects the next one: a sound site enables a buildable design, and a correctly sized plant gives commissioning a fair start. Before you sign a lease or freeze a budget, talk to Yangsheng Ice & Snow about ice venue design, refrigeration system construction and turnkey delivery. Bring the site facts first; the rink layout can then follow with fewer surprises.